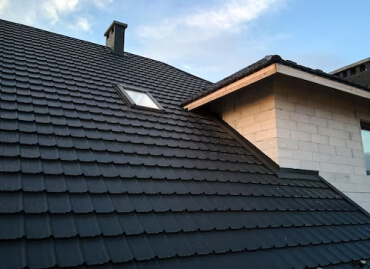
RoofCont provides expert roofing, siding and contractor services, specializing in installations, repairs, and replacements for residential and commercial properties.
RoofCont provides expert roofing, siding and contractor services, specializing in installations, repairs, and replacements for residential and commercial properties.

Installing shingles on a roof requires precision, the right materials, and attention to detail to ensure a durable and long-lasting roof. Whether you're a DIY enthusiast or prefer hiring professionals, understanding the installation process is crucial for ensuring the integrity and longevity of your roof. Here's an in-depth guide on how to properly install shingles on a roof.


Before you begin, ensure you have all the necessary tools and materials:
Having everything prepared ahead of time makes the installation smoother and safer.
If this is a re-roofing project, begin by carefully removing the old shingles. Use a pry bar or roofing shovel to lift the shingles and nails. Removing the old shingles gives you a clean surface to work on and helps prevent hidden damage. Ensure the roof decking is inspected for water damage, rot, or mold. Replace any damaged areas to avoid future problems.
Installing underlayment is essential for protecting your roof from water infiltration. Start at the bottom edge and roll the underlayment across the roof deck, working upward. Overlap each row by about 4-6 inches to prevent water from seeping through. Secure the underlayment with roofing nails or staples. For extra protection, you can also apply an ice and water shield to roof valleys or areas prone to ice dams or heavy rain.
A drip edge is critical for preventing water from seeping under the edges of the roof. It is installed along the eaves and rakes of the roof. Begin by nailing the drip edge to the lower edges of the roof (along the eaves) first, and then follow with the sides (rakes) after installing the underlayment. The drip edge helps channel water away from the fascia and into the gutters.
A starter strip is crucial for securing the first row of shingles. It acts as an additional barrier, ensuring the bottom shingles adhere properly. Install the starter strip along the roof edge, ensuring the adhesive strip faces the edge to create a water-tight seal. You can either purchase pre-made starter shingles or cut the tabs off regular shingles for this purpose.
Start from the bottom edge and work upward in rows. Here’s how:
Skylights, vents, chimneys, and other roof penetrations require special attention:
Ridge cap shingles are specially designed to cover the peak of the roof. Begin at the far end of the ridge and work towards the center. Ensure each ridge cap shingle overlaps the previous one by about 5 inches. Use roofing nails on both sides of the ridge cap to secure them in place. This final step not only seals the roof but also adds an aesthetic touch.
Once the shingles are installed, inspect the roof for any missed spots, loose shingles, or exposed nails. Apply roofing cement to cover any exposed nail heads, which can prevent future leaks. Walk around the roof to ensure everything is secure, straight, and properly sealed.
After installation, it's essential to clean up any remaining debris, nails, and leftover materials. Ensure gutters and downspouts are clear of debris to allow proper water flow. A clean work area ensures no damage or hazards are left behind.
Installing shingles on a roof can be a challenging yet rewarding task. It requires careful preparation, precise installation, and the right materials to ensure your roof lasts for decades. While DIY shingle installation is possible, hiring professionals can save time, ensure safety, and provide a higher-quality result. Professionals can also identify underlying issues that may be missed by untrained eyes. Whether you choose to tackle the project yourself or enlist expert help, proper shingle installation is key to a strong, weather-resistant roof.

Neque porro est qui dolorem ipsum quia quaed inventor veritatis et quasi architecto var sed efficitur turpis gilla sed sit amet finibus eros. Lorem Ipsum is simply dummy
Ralph edwards
March 20, 2023 at 2:37 pmNeque porro est qui dolorem ipsum quia quaed inventor veritatis et quasi architecto var sed efficitur turpis gilla sed sit amet finibus eros. Lorem Ipsum is simply dummy