RoofCont provides expert roofing, siding and contractor services, specializing in installations, repairs, and replacements for residential and commercial properties.
RoofCont provides expert roofing, siding and contractor services, specializing in installations, repairs, and replacements for residential and commercial properties.
A roof valley leaking issue doesn’t wait for permission—it creeps in quietly and causes real damage fast. This type of leak begins where two roof slopes meet and channel rainwater. Over time, debris, cracked shingles, or worn flashing allow water to enter.
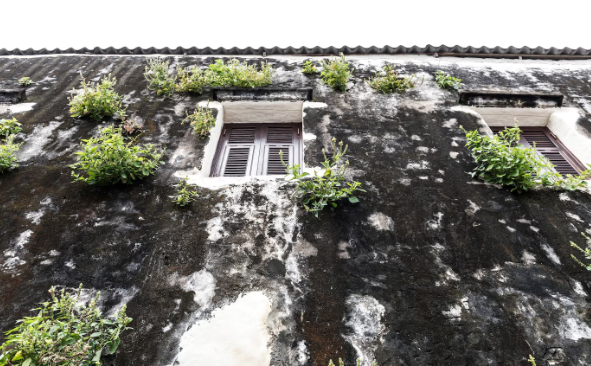
That leak may start small, but it spreads across the roof deck, into the insulation, down the ceilings, and even into the walls. The damage extends beyond stained drywall. Wood rot, mould, and high energy bills follow closely behind. Many homeowners don’t spot the problem early enough because roof valleys stay hidden under shingles and debris.
But signs start to show indoors—brown ceiling patches, peeling paint, and musty smells near the attic. Those aren’t small issues. They all point to moisture from a leaking valley above. Every heavy rainfall adds to the problem. And in colder areas, snow melts into the valley and freezes, pushing gaps wider.
So, taking action early matters. Repairing the valley costs far less than replacing ceilings or structural supports. Spotting and fixing it fast keeps the home safe and dry. This topic covers how to detect leaks, what tools work best, and how to fix or replace the materials before they get worse. Roof valley leaking may sound like a narrow problem, but it opens the door to big trouble.
A leaking roof valley causes serious roof damage fast. Start by clearing all leaves and debris from the valley. Use a pry bar to lift shingles near the leak. Look closely for broken, rusted, or loose flashing. Cut out the damaged part. Slide in a new flashing made of galvanised steel or aluminium.
Nail it down tight and apply roofing cement over every seam and nail. Press the shingles back in place and secure them firmly. Seal all edges to block future water entry. Check the slope to make sure water drains quickly. Spray water from a hose to test the area.
Watch for drips inside the attic and around the ceiling. A steady repair always needs good weather. Clear skies help roofing cement dry fast and prevent trapped moisture. Finish the job on the same day to avoid more leaks.
After sealing, walk along the roof to double-check your work. Watch for soft spots, sagging, or popped nails. A tight repair with strong flashing keeps the valley safe and leak-free for years. Avoid using shortcuts or skipping materials. A full repair today always saves bigger repairs later.
Many homeowners repair roof valleys leaking without hiring a roofer. Small leaks often come from cracked sealant, curled shingles, or loose nails. Use a ladder with rubber feet and wear roofing gloves. Lift shingles gently and check the flashing. Clean the area first. Apply roofing cement over any gaps or exposed nails. Tap shingles back into place and nail them down tight. Press them flat and seal the edges again. Choose a sunny day to help cement dry fast. Take breaks, but finish the job before sunset. Use a flashlight in the attic and check for water spots. Leaks show as dark patches or damp wood. Mark them and check above that area on the roof. Keep tools close to avoid delays.
Stick with safety steps and stay calm during the repair. Many people handle small repairs successfully. Still, deep water damage or missing sections need a roofer. Stay honest about your skill level. Simple patchwork can work great for early leaks. Tackle the problem fast to avoid big problems later. A careful repair can stop ceiling stains, mould growth, and wood rot tomorrow.
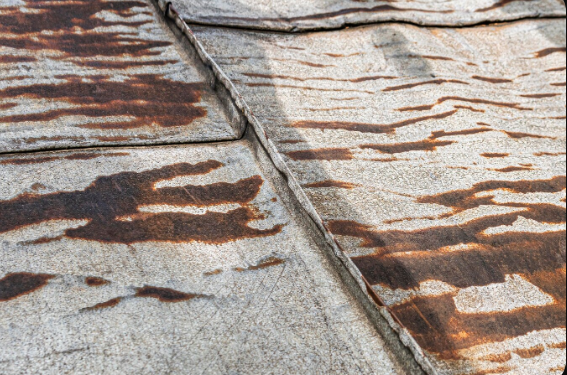
Roof valley leaking usually starts with a weak spot in the flashing. Light rust or a single tear may look harmless, but spread quickly. Use a pry bar and lift the shingles. Check the full length of the flashing.
Look for holes, dents, and rust. Flashing with wide rust patches or multiple tears needs full replacement. Cut back the shingles and pull out the old flashing. Use a solid metal replacement like copper, steel, or aluminium. Place it flat and secure it with galvanised nails.
Apply roofing cement along every edge. Lay the shingles back and seal them with more cement. Test the new valley by spraying water from top to bottom. Keep your eyes on any drip marks inside the attic.
Full flashing replacement takes more time, but protects the roof much better. Damaged valleys never fix themselves. Moisture slips under loose metal and spreads fast.
Replace the entire valley if the damage looks wide or deep. Strong new flashing keeps water flowing in the right direction. A fresh install stops leaks and prevents future rot, mould, and insulation damage.
Repairing a roof valley leak usually takes two to five hours. The time depends on how much flashing or shingles you need to replace. Basic patch jobs move faster. Full valley repairs take longer, especially with the tear-off and flashing installation.
Start early in the day to avoid roofing in the dark. Gather all tools before climbing the ladder. You’ll need roofing nails, a pry bar, sealant, shingles, gloves, and flashing sheets. Begin at the top and move downward. Lift each shingle, check for damage, and replace any weak spots. Place new flashing flat and nail it down every foot.
Press shingles tightly and apply roofing cement on seams and nail heads. Let everything dry before testing the area with a hose. Inspect the attic and ceiling after water testing. Look for new drips or stains. Work steadily and avoid skipping steps. Fast work often misses hidden issues.
A full repair gives peace of mind and lasting protection. Always aim to complete the job in one sitting. Finish every edge and seal all seams tightly. Strong repairs take time, but stop leaks for years.
Detecting roof valley leaking requires a few reliable tools. Use a garden hose first. Spray the valley slowly from the top and watch inside the attic. Water dripping confirms the leak spot. A flashlight helps track the path of the leak indoors.
Shine it on the roof decking and rafters. Moist areas appear darker than dry wood. Mark them with tape. Use a moisture meter next. Press it on suspected wet spots inside the attic. It gives a quick reading and confirms moisture levels. A pry bar lifts shingles gently for closer inspection. Check for water stains under shingles or along flashing. Bring roofing gloves to protect your hands from nails and sharp edges. A chalk line helps guide straight cuts and flashing placement during repairs. Never skip safety gear. Use a sturdy ladder and wear non-slip shoes. Roof inspections take time and patience. Focus on each section and double-check your work. These tools give a clear view of the leak source and prevent guesswork. A well-prepared inspection catches early damage and avoids big costs later.
Roof valley leaking doesn’t fix itself—it gets worse with every rainfall or snowmelt. When water slips through weak spots, it damages your ceiling, rots wood, and invites mold. But you can stop it. Start by spotting the signs early—stains, smells, or damp patches. Then take action. Clear debris, seal gaps, or replace old flashing before the leak grows. You don’t have to be a pro to fix small problems, but don’t ignore serious damage. Every step you take now saves time, money, and stress later. Stay alert, stay safe, and keep your roof valley leak-free for good.
Deprecated: File Theme without comments.php is deprecated since version 3.0.0 with no alternative available. Please include a comments.php template in your theme. in /home/u737183660/domains/roofcont.com/public_html/blog/wp-includes/functions.php on line 6131